When a foam insert solves a packing problem
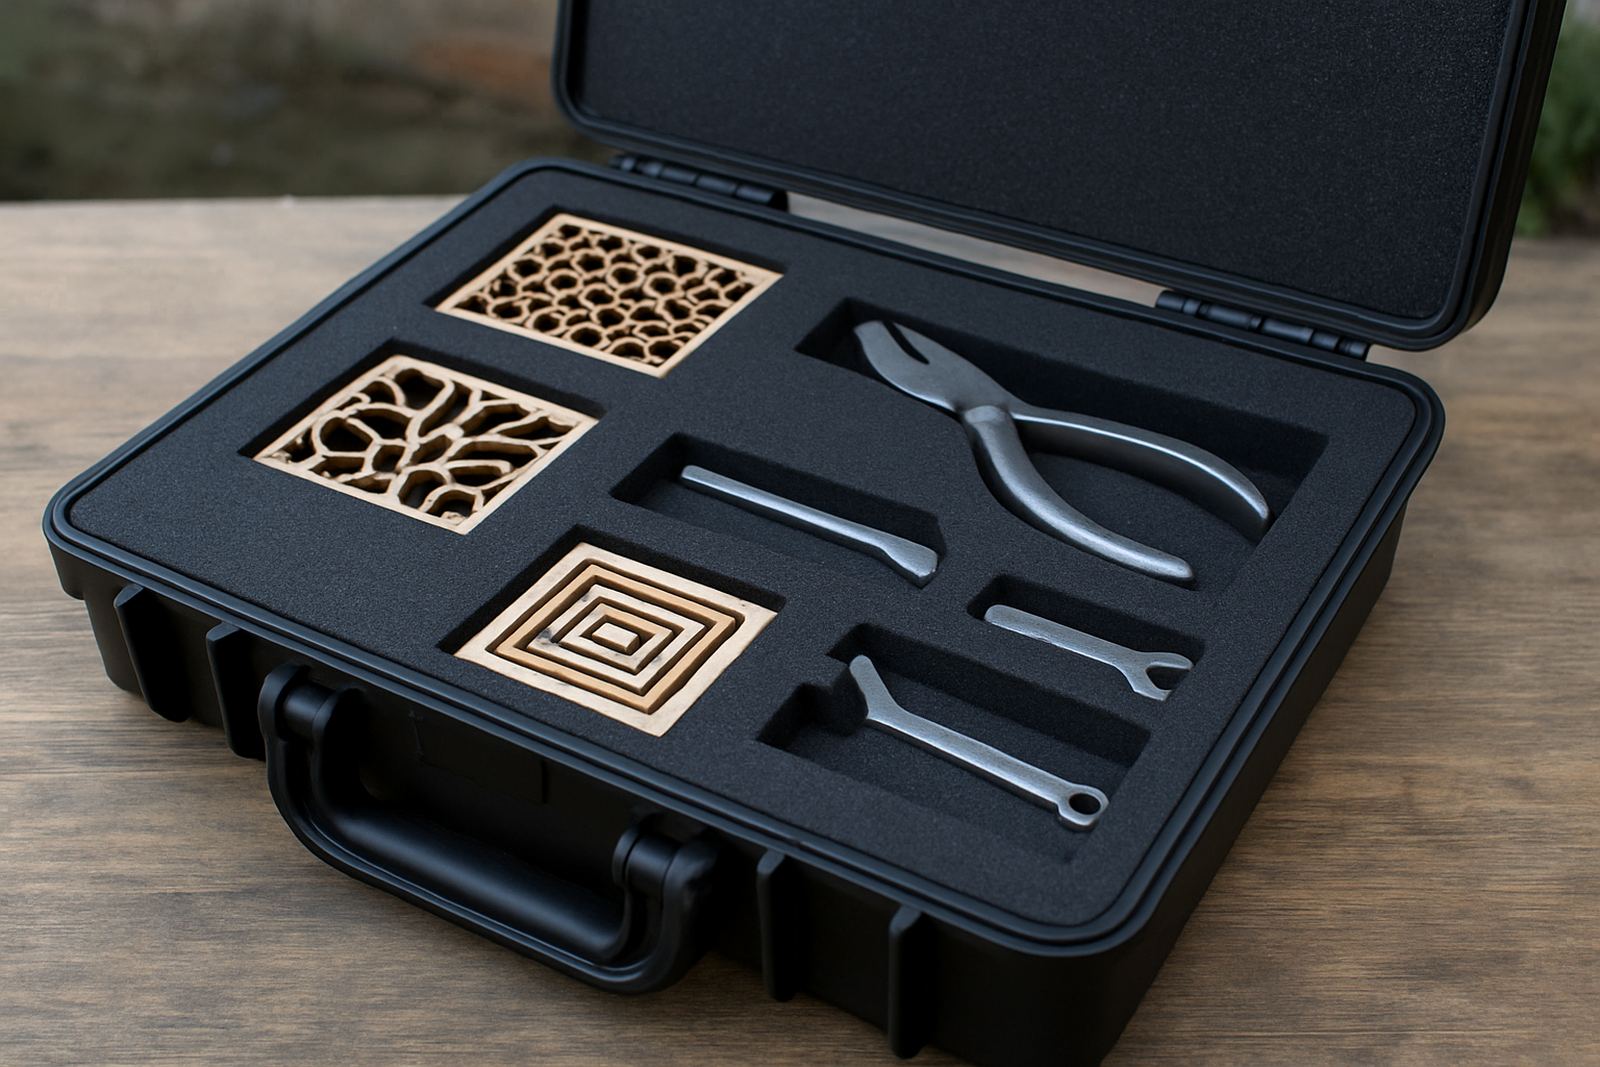
If a product moves inside a case, picks up scuffs in transit or looks untidy when it is opened, a shaped foam insert is usually the answer. We see this with tools, glassware, electronics, display sets, samples, instruments and premium gift packs. In Johannesburg, where parcels may pass through couriers, warehouse handling and long road runs in the heat, a snug cavity can save a lot of breakage.
For presentation work, a neat foam layout also lifts the perceived value of the item. A clean cut around each product makes the box easier to use, easier to restock and easier to show to clients at a launch, expo or site visit. If your team is packing by hand every day, a fixed insert can cut time and reduce mistakes, even during load-shedding when every minute counts.
Typical machine set-up for foam cutting
CO2 laser cutting is suited to many foam grades used for inserts, especially where you need crisp edges and repeatable shapes. The exact set-up depends on thickness, density and how the foam behaves when exposed to heat. In practice, most customers start with sample sheets, then move to short production runs once the settings are confirmed.
- Standard foam sheets for cases, trays and presentation packs
- Closed-cell foam for better water resistance and cleaner handling
- Open-cell foam where a softer grip is needed for light items
- Multi-layer builds for mixed items, cut-outs and stepped depths
- Simple text or identification marks for batch control
For thicker blocks, the layout has to allow for accurate cavity depth and safe handling. The operator also needs to watch for heat build-up, because some foam types can warp or char if the settings are pushed too far.
Planning the layout before any cutting starts
The best inserts begin with exact product measurements, not rough estimates. Allow for the outer dimensions, handle clearances, cable space and any protective wrap the item may travel with. A cavity that is too tight makes packing slow and can mark the item, while one that is too loose defeats the purpose.
It helps to map the insert from the bottom layer upwards. Decide which parts need the deepest support, which areas can float and where the user should grip the product. For presentation boxes, leave a little finger room so the item can be lifted out cleanly. If the foam will sit in a hinged case, check lid clearance carefully, because a few millimetres can make the difference between a neat close and a crushed top layer.
- Measure the product at its widest and tallest points
- Allow for labels, plugs, nozzles and protruding parts
- Test one sample cavity before cutting the full batch
- Group similar items together to reduce waste
- Check case size against the final foam thickness
Common mistakes that push up scrap and cost
One of the biggest mistakes is treating all foam as if it cuts the same way. Density, colour, thickness and composition all change the finish. Another problem is drawing cavities too close to one another, which weakens the web between cut-outs and can lead to tearing when the insert is lifted. A layout that looks fine on screen can fail once the foam sheet is in hand.
People also forget about the end user. If the insert is for a sales kit, the product should be easy to remove and return. If it is for storage, the fit can be firmer, but it still should not require force. On coastal jobs, especially around Durban and the Cape, humidity can affect storage and handling so your foam and outer packaging should be kept dry before use.
Budget ranges in Rand for small and larger runs
Foam insert pricing is usually driven by material type, sheet thickness, cavity complexity and quantity. A simple one-off sample insert for a single case may start from about R450 to R1 200 depending on the material and the amount of setting up needed. A short run for presentation boxes or small product kits often falls between R2 500 and R8 000.
For larger production batches, the unit cost drops once the layout is locked in and the cutting sequence is stable. A higher-spec insert with multiple layers, repeated branding marks or careful fit for delicate equipment will sit above the basic range. If the insert needs regular replacement, it is worth budgeting for repeat supply, because the cleanest solution is not always the cheapest on day one but it can be better over 12 months.
Installation, training and support from Wynberg to nationwide sites
LaserCutter CO2 works from Wynberg, Johannesburg and supports demo cuts, installs and operator training across South Africa. For foam insert work, that matters because the team setting up the machine must know how to handle the material, keep the optics clean and manage extraction properly. A good cut can still go wrong if the bed is not level or the airflow is weak.
Our practical support covers machine installation, preventive maintenance, beam alignment, cooling checks, extraction service, relocation help and breakdown response. When a site in Sandton, Midrand or the East Rand needs fast turn-around, or a Cape Town or Durban client needs operator guidance, the aim is to keep production steady and reduce avoidable downtime.
- Wynberg demo room for sample cuts and material testing
- Training for operators, supervisors and production staff
- Remote support for common set-up and cutting issues
- Annual service planning for busy workshops and pack lines